Connect your Verofy® Move to WiFi
This page talks you through connecting your terminal to a WiFi Network (or mobile hotspot).
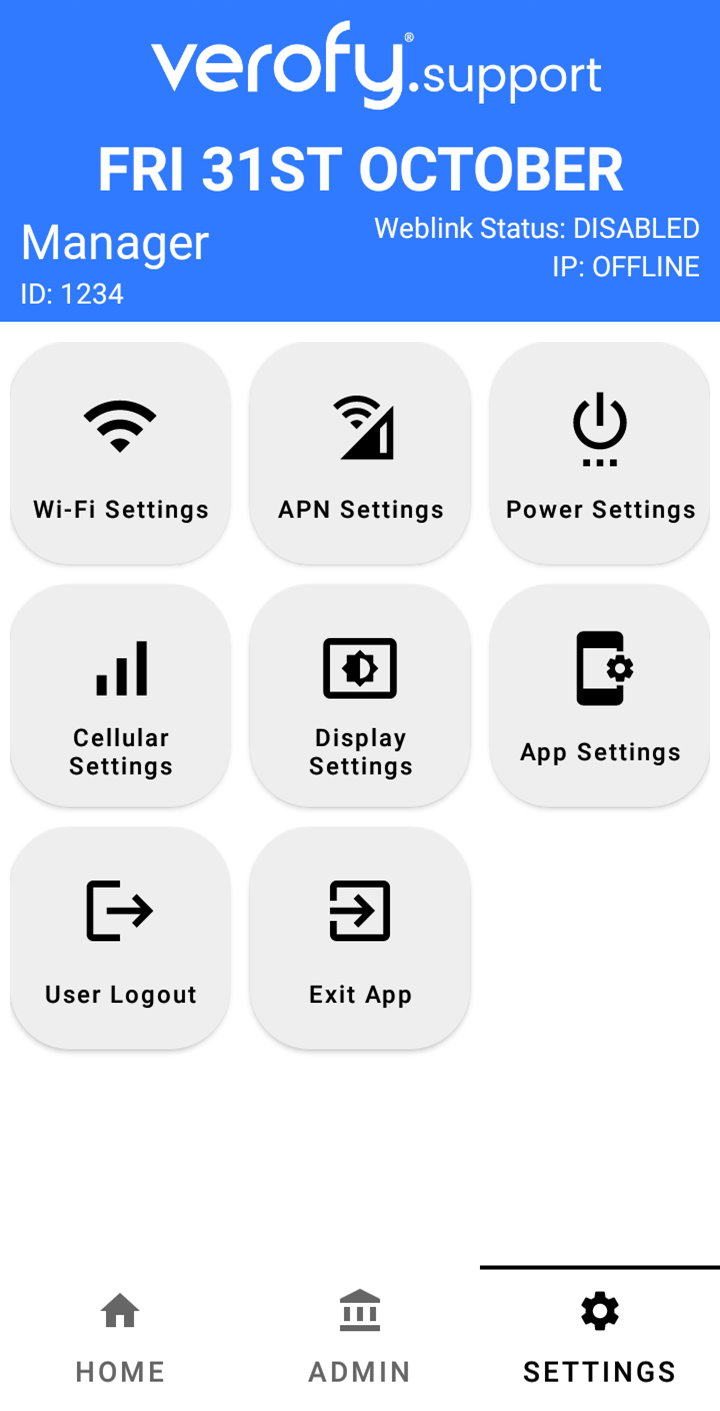
- To get started, head to the Settings menu from the start up screen and find the WiFi Settings option.
Please note - the WiFi Settings option you'll need might be situated in a different place to the below guide if you've already logged into your Verofy® Move.
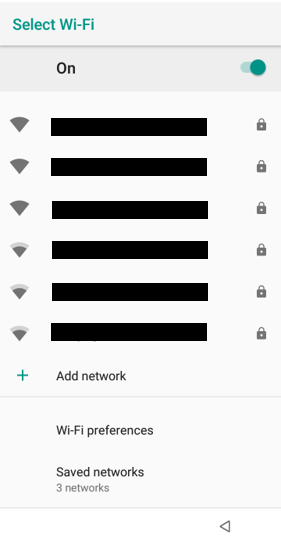
- You'll see a list of the available WiFi networks to connect to. Select the relevant WiFi network.
We recommend ensuring the network you are connecting to is secure. Your WiFi network should be password protected and we recommend that you avoid joining 'open' networks.
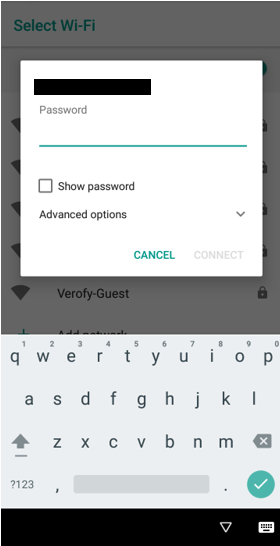
- Once you've selected your WiFi network, you'll need to enter the password for the network. This is usually located on your WiFi router. Once you've entered the password, press 'Connect'.
The password will be case sensitive so use the keypad to capitalise letters and find symbols if they are included in the password. If you need to check the password you've entered is correct before continuing, you can tick the Show password box to unmask the password on the screen.
- The terminal will then return to the available networks list. The WiFi network you selected will move to the top of the list and show the word 'Connected' underneath. You can easily get back to the menu page by clicking the triangle at the bottom right of the screen.

You're now connected to WiFi and ready to take payments.