Refunding integrated payments remotely (when the customer is not present)
Before you can refund a transaction, make sure your Verofy® Move is on the integrated home screen.
If you're not sure how to get connected, you can find out below.
Connect via network
- Once a refund is initiated, the terminal will prompt that Authorisation is required. You'll need to enter the 'Supervisor' User ID and password to continue. Press the green tick to continue.
This provides additional levels of security for your business, and ensures staff members cannot complete refunds unless they know the Supervisor login details.
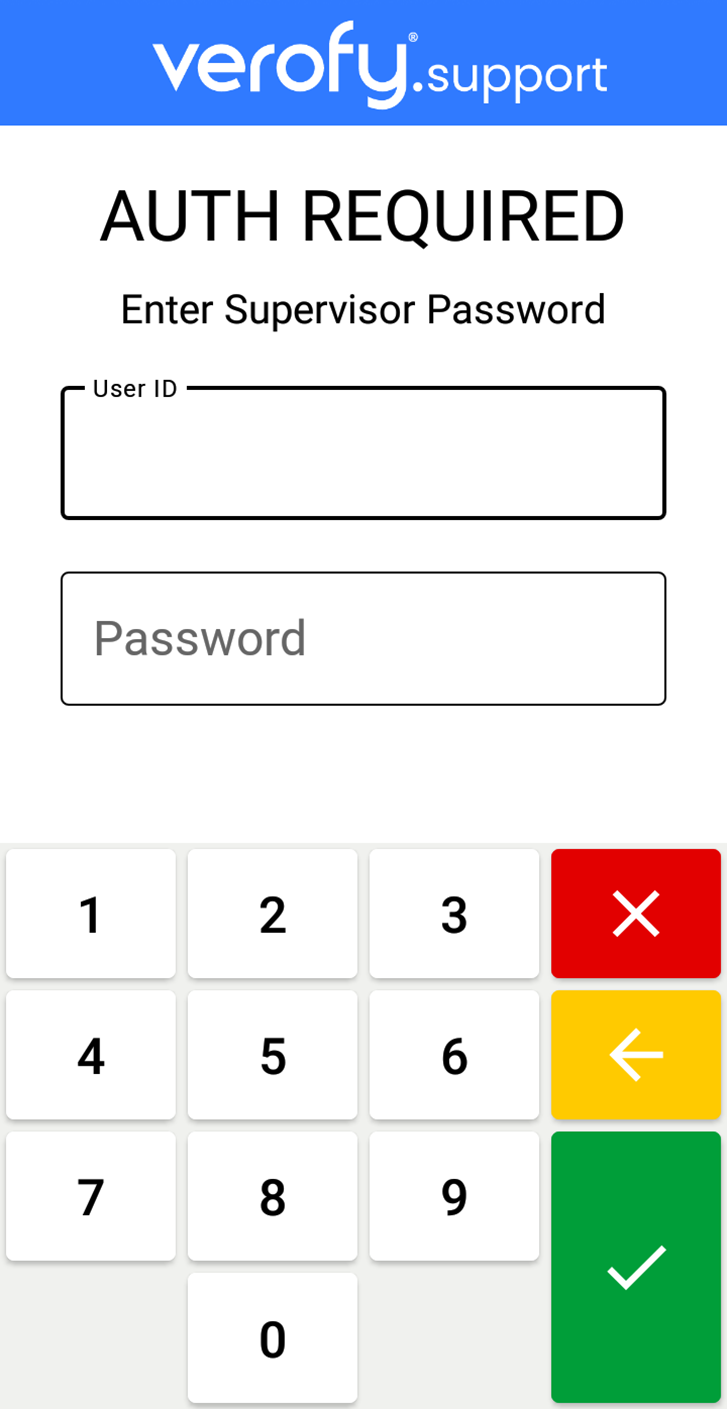
If you don't know your Supervisor login, you can request help with this by using our message centre in app to contact us.
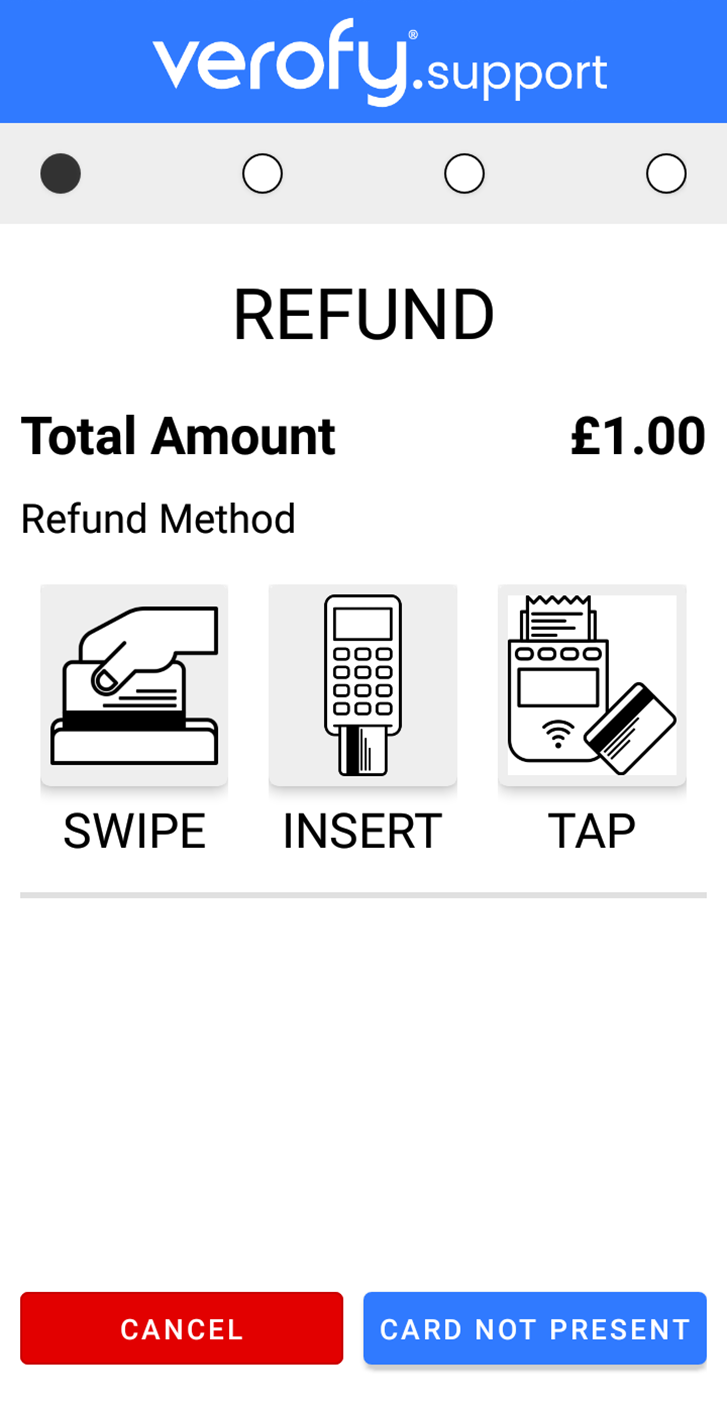
- The Verofy® Move will then present the payment screen. Select the Card Not Present button.
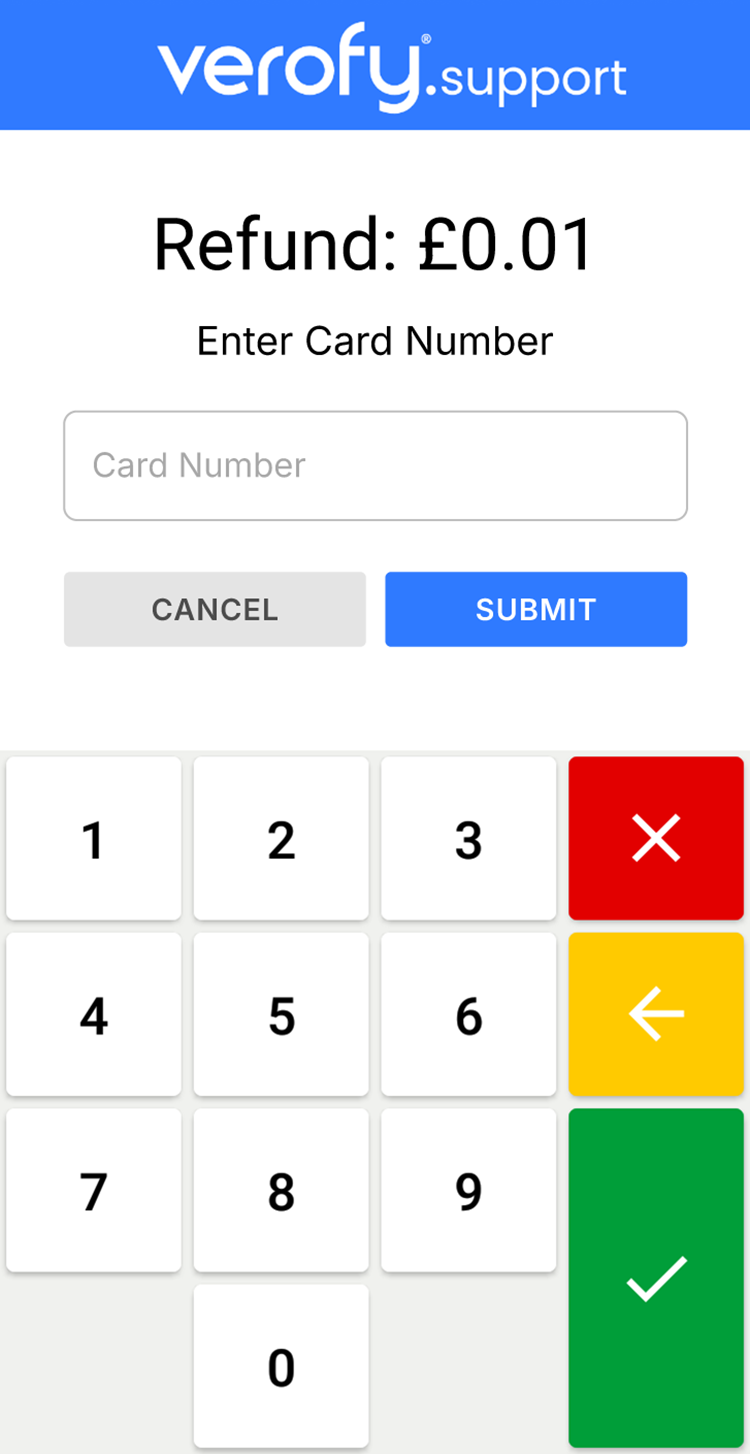
- You'll then need to enter the long 16 digit card number (the customer will need to confirm this to you). Once entered, press submit.
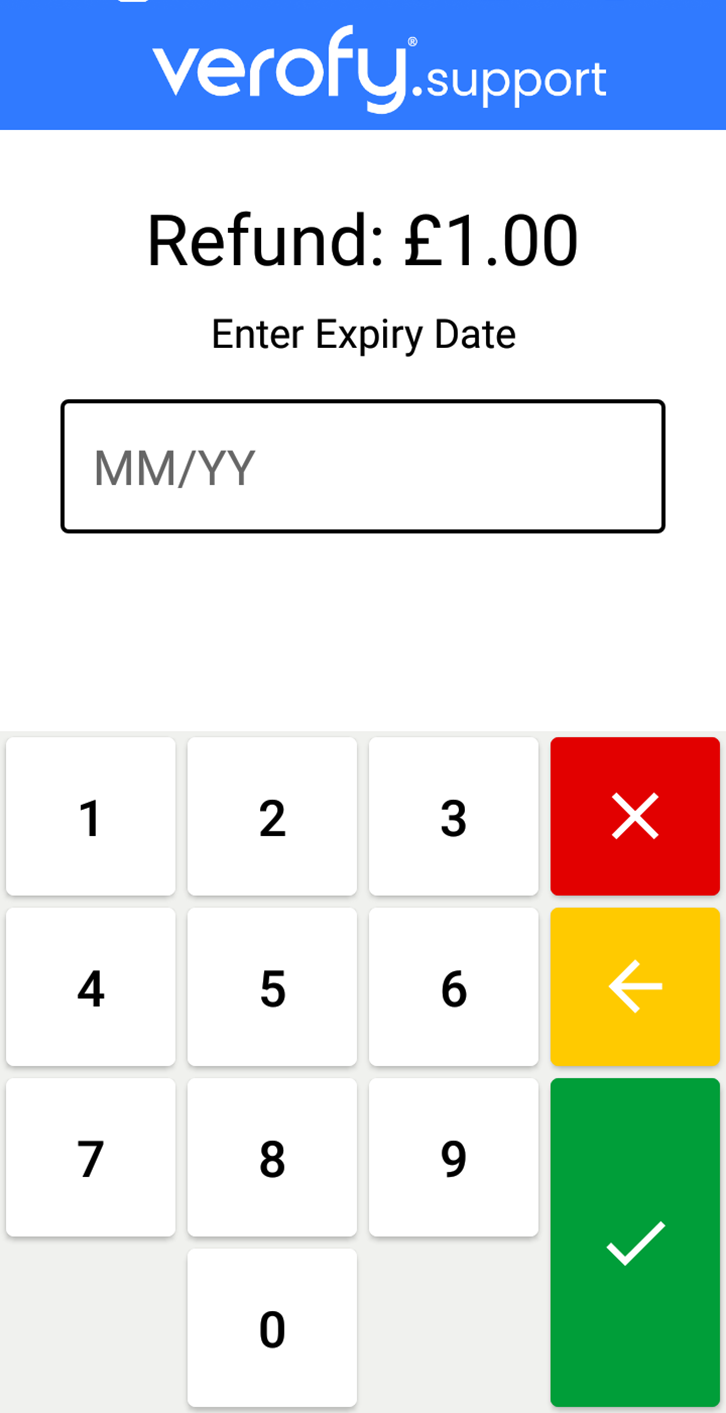
- Next, you'll need to enter the expiry date of the card, Once you've done this, press the green tick.
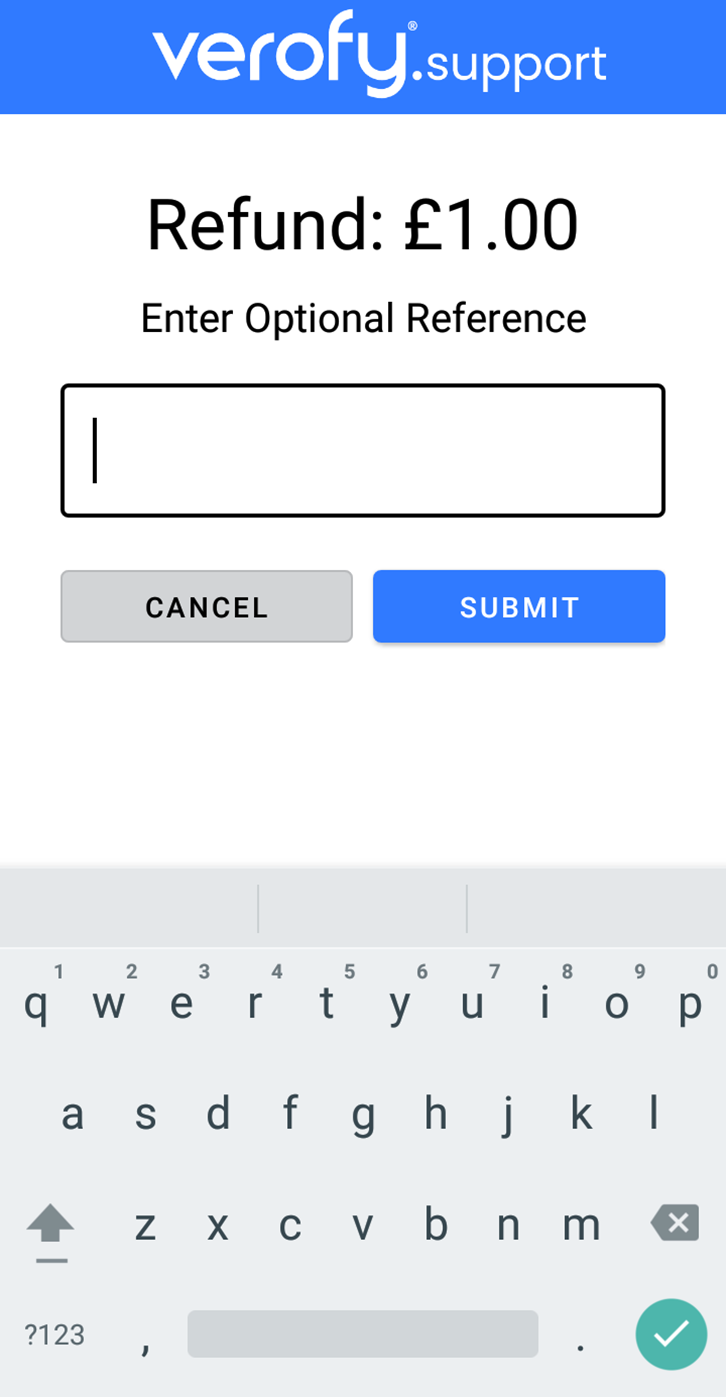
- Next, you'll be asked if you wish to add an Optional Reference to the transaction. If you don't want to add a reference, press submit.
- If the refund amount and card presented are correct, the terminal will process the refund and you'll see the 'Success' screen.

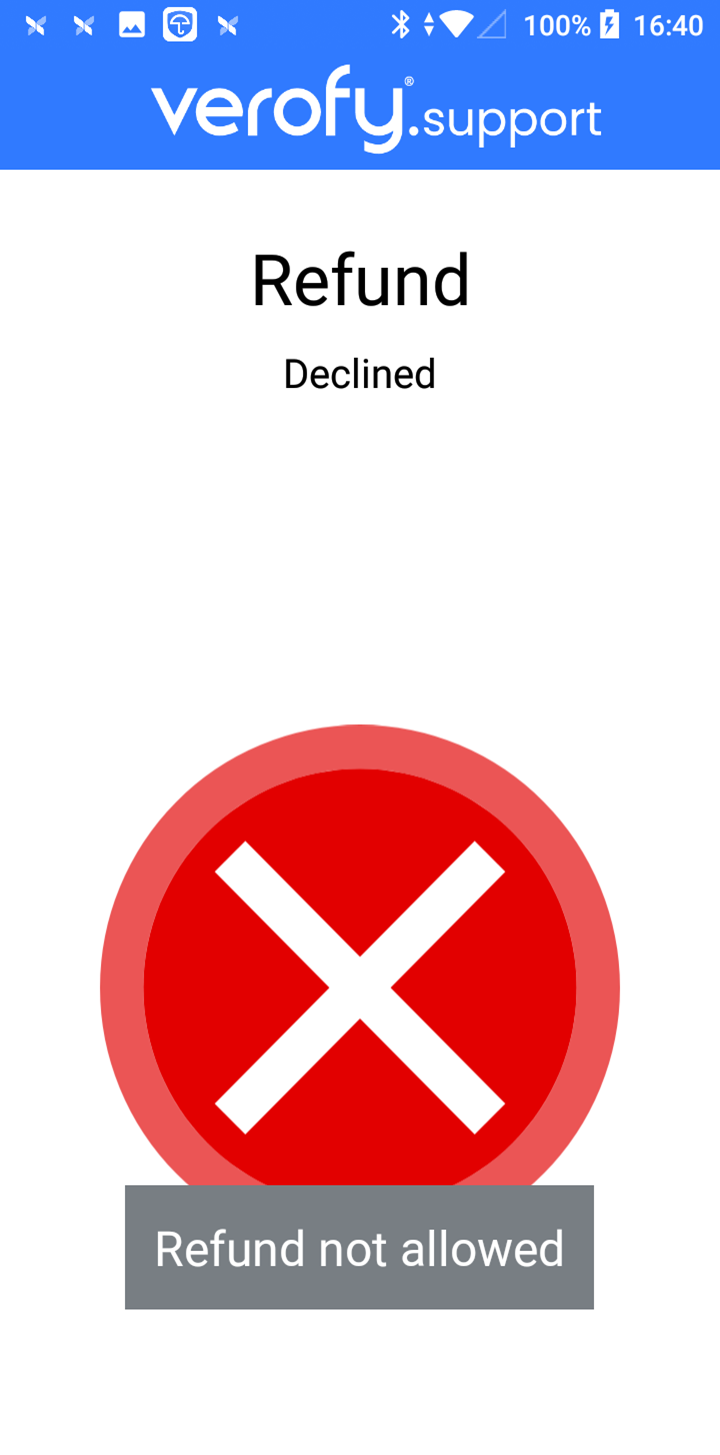
If the amount of the refund entered is too high or the card presented does not match, you'll see the 'Refund Not Allowed' message and the 'Declined' screen. The refund will be cancelled and you'll need to start again.
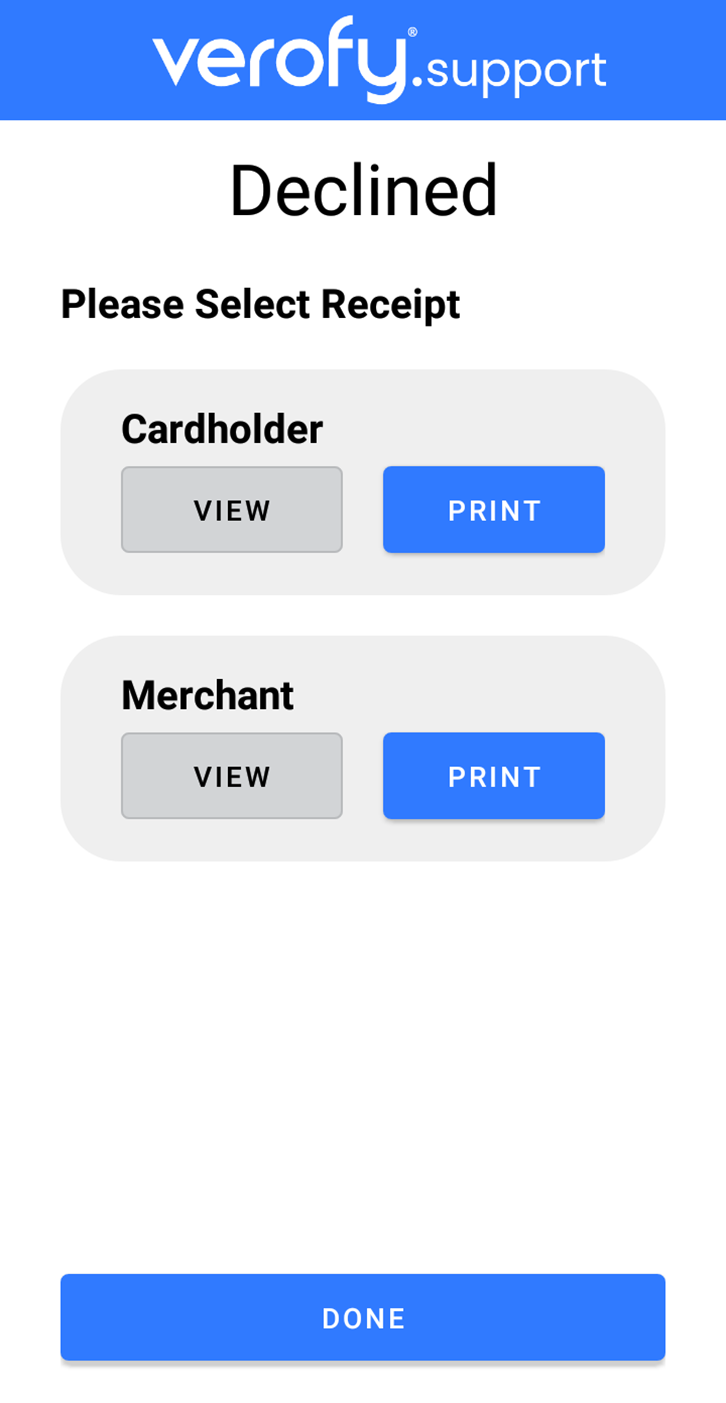
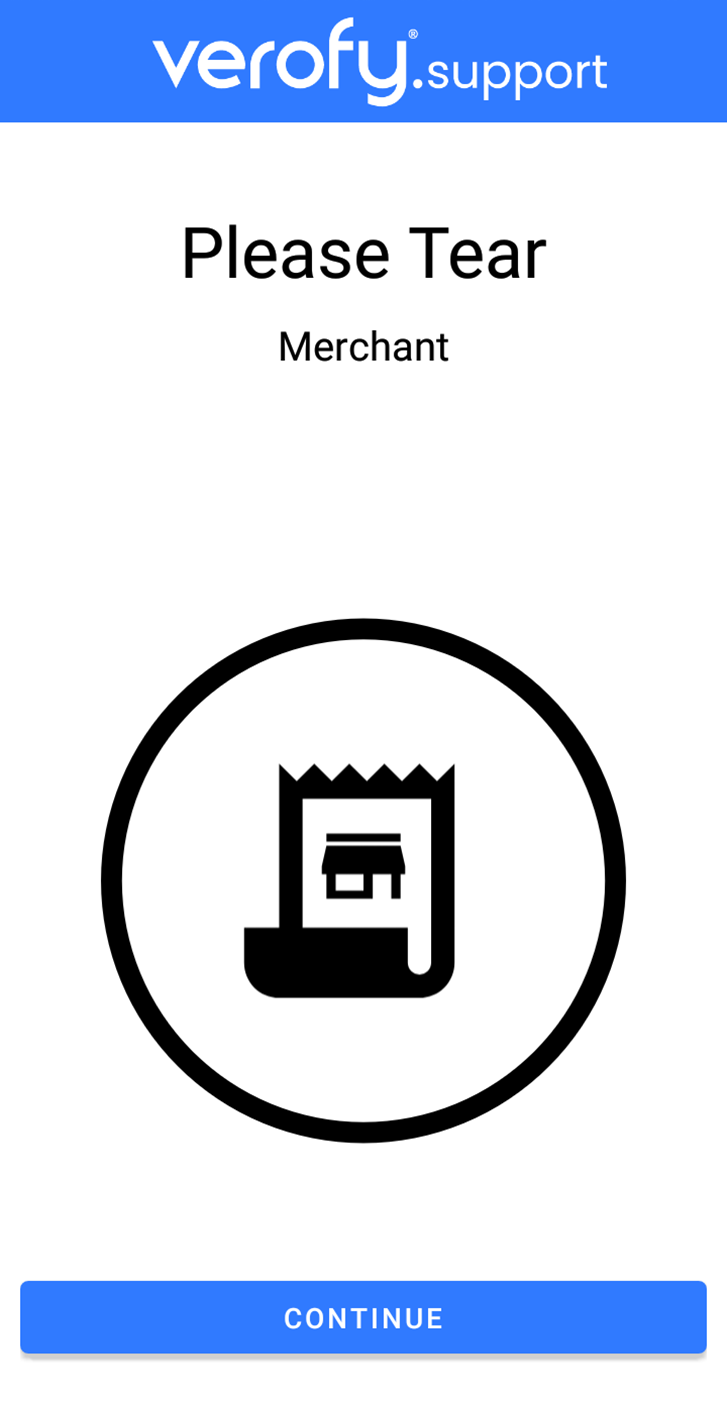
- The terminal will then print the receipt copies unless you have terminal printing disabled in integrated mode. If you have Print to screen enabled, you'll be prompted to view/print the receipts. You'll need to press Done / Continue to complete the transaction fully on the Verofy® Move.

8. Your till system should recognise that the transaction is completed, and your Verofy® Move should return to the integrated home screen, ready for the next transaction.